I have been working on my Rose Garden for a few years now, around two to three years. Some Roses were brought from Arizona to Oregon during our last move, and a few were planted by the previous owners. Then for the past few years, I have asked for Roses for Mother’s day, birthday, anniversary etc. Finally we had time to put a fence up to keep my very naughty chickens out of the garden. They are very good at digging my bulbs up and generally destroying landscaping. Once the gates were on I knew it was time to start creating my shrines! For a long time I had wanted to have two large statues in this garden. Dedicating it and all the beautiful flowers that grow there to Aphrodite and Persephone.
I started researching grottos, how to make one, where to purchase one and as it turns out they were either really complicated or really, really expensive. I had already spent a pretty penny on the two 3 foot statues and didn’t really have the funds to spend almost $200 on each grotto. I was either going to have to buy one and ship it here costing quite a bit in shipping, or create my own. I started researching bricks and stones and how to construct them and I began to get frustrated, wood would leak, I didn’t have the skills to work with stone or brick and I was running out of options.
I was sitting in meditation one day trying to figure out how to pull this off and I began to see the general image of a grotto, the shape, the material and an important factor, it must be water proof! While some water or rain may splash in from time to time, it was very important to me to have a place where candles and spells could safely burn for a few hours when necessary.

The next morning it came to me! The perfect shape was an oval, the perfect material would probably be metal that doesn’t rust and something deep enough to create a small covered place. The one thing I had recently seen was a galvanized feed trough at the farm store. I knew they were much more affordable than the expensive grottos I had seen online and I would have more space and freedom with these. So I took measurements and headed to the feed store. I ended up coming home with 2, four feet long and 2 feet deep feed troughs. I also selected white marble stones for Aphrodite and Red Lava Rock for Persephone and headed home to create the shrines.
I first had D. Dig holes large enough to fit the feed trough in sideways. I then buried the bottom half so that only the top ¾ of the feed trough was above the earth. Anchoring them in with dirt was a perfect idea because they didn’t move. Once they were anchored in, I placed large stones in the center and then the statues on top. From there I added the stones all around covering all the dirt. I then chose a few small flowers and bulbs to plant around the grotto. Light pinks and blues for Aphrodite and deep purples and red for Persephone.
Once this was set, I grabbed the box I had been storing some of their old votive offerings in and carried it out to the newly finished shrines. I added a small statue of Hecate to Persephone’s Grotto as her companion. I also added Black candles, and a clay vase I have had since I was 16. I finished by lighting the candles and incense and then consecrating the space in my usual format.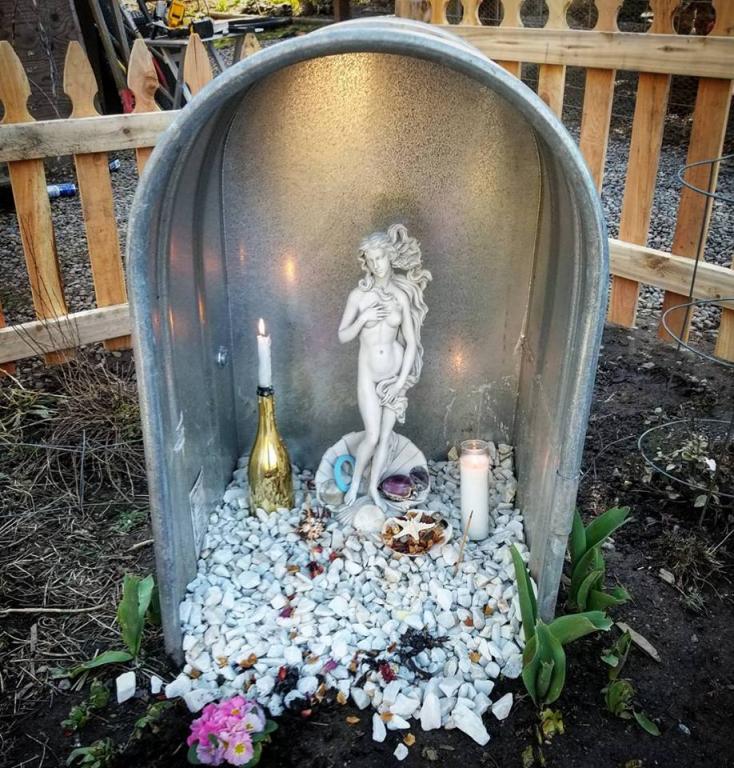
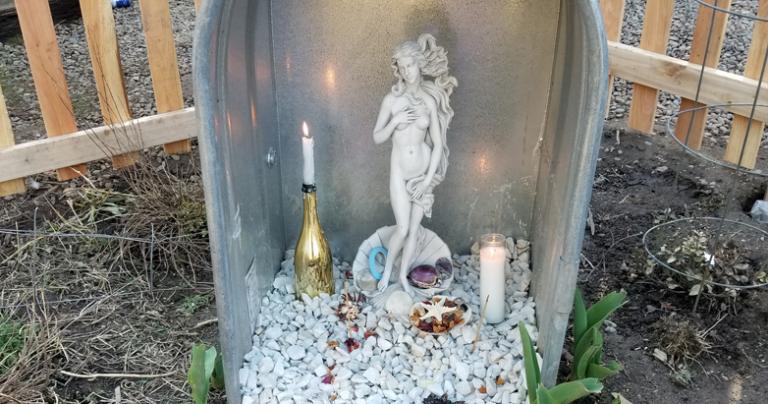
Then I moved over to Aphrodite’s shrine, which is across the garden from Persephone. Her Grotto is in front of Hydrangea bushes, with its beautiful blue blooms. Her grotto is similar but different to Persephone’s. It contains white marble stones, mirrors, and a gold bottle that has a beautiful reflection. Shells, crystals and candles also adorn her statue. When I was finished like Persephone’s grotto I lit the candles, incense and consecrated the shrine.
Though there is still a few small steps to be taken in the garden, such as trimming the roses, planting a Camilla and covering the rest of the dirt with wood chips the garden is mostly finished and ready for an abundance of spring blooms!
Learn more about Annwyn by clicking here