Collecting and saving seeds from one season to the next is simple and allows you to keep growing the plants you love best. Here are a few tips and techniques to guide you.
1. First of all you’ll need to have planted open-pollinated varieties. They’ll come back true to the cultivar whereas hybrids won’t. Hybrid seeds can’t be saved; the majority of seeds turn out to be infertile with a less than 20% germination rate, and those that do germinate rarely grow well.
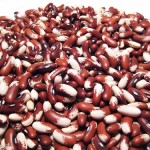
2. To gather seeds of flowering plant, first allow blooms to dry on the stem. Deadhead into a small paper bag (or plastic container). Write name of plant on bag with a permanent marker. Gently crush the flower head with your fingers to release the seeds and discard the chaff. For vegetables, let fruit fully ripen, harvest, wash produce, then remove seeds from flesh.
3. Spread the seeds on black ink newspaper, parchment baking sheet, paper towel, or paper bag and let them air dry for about a week. Write seed names on the paper so there’s no mix-up. To save space place sheets of seeds on large wire cooling racks stacked one atop another and secured with twist ties at little v-foot risers—before laying seeds on paper to dry, cut paper to size and notch in from edge for risers.
4. You can dry vegetable seeds on unprinted paper towels, but they’ll stick to the towels when dry. The benefit is that you can roll them up right in the towel to store them. When you’re ready to plant, unfurl and tear off bits of the towel, a few seeds at a time, and plant seed and towel into the soil.
5. Gather dried seeds into envelopes. You can make your own envelopes, just print the pattern below. Once labeled place seeds in largest area, fold over the biggest flap (with leaf pattern). Use a glue stick on edges of smaller flaps, fold over and press to seal.
6. Use clean storage containers that will be air tight. Place seed packets in plastic food storage bags, glass jars with tight-fitting lids (wide-mouth quart canning jars work great), or glass canisters with gasket under lids.

7. To keep seeds dry, wrap 2 heaping tablespoons of powdered milk in four layers of plain, untreated facial tissue, fold over and tape corner. Put the milk packet inside the storage container with the seed packets. Replace milk packet every six months if you keep the seeds past the next planting season. You could use silica gel packets, too.
8. Humidity and warmth shorten a seed’s shelf life, so think cool, dark, and dry. A corner of the basement or semi-heated garage will work, but keep seeds from freezing. The refrigerator is generally the best place to store seeds. When its time to plant, remove seed containers from the fridge—keep them closed until the seeds warm to room temperature. Otherwise, moisture in the air will condense on the seeds.
9. Keep each year’s seed harvest together by date. Most seeds last about three seasons—some only two. A glance at the dates will tell you if the seeds are past their prime for planting.

10. When planting season comes, test a small group of seeds for germination rate. Even with careful collecting and storage, a certain number of seeds will not germinate. By checking first you’ll know how many seeds to sow to get the number of plants you’ll want in the garden.
God has placed within the seed all it needs for its future, we need only to gather and grow.