Don’t you love those transformation stories that start with one little piece and trail off into an entirely new and exciting adventure?
Well this is one of those stories, so grab a cup and join me as I spin my tale.
It began with a dish. One beautiful, blue flow platter with the prettiest little scalloped edges. My sweet grandmother passed away early last year. My family had the difficult task of sorting through her things which was when this dish was found. No one in the family wanted it, but my mother knew I would enjoy having this beautiful piece to remind me of my grandma.

And I did!
But she wasn’t happy in her new home.
And I wasn’t happy with her resting place. I adore my hutch that came from my husband’s family, but the orange-y hue from the knotty pine and I weren’t besties. In fact, this hutch was in need of attention before problems set in.
My Inspiration
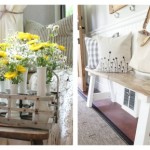
One day, I stumbled upon this pic from Decoist. Y’all – this stopped me in my scroll!

I mean, this hutch could be a long lost distance cousin to my hutch, twice removed! And that blue! I knew my new plate would look so beautiful sitting on that hutch.
Inspiration struck and I knew I was going to be painting knotty pine soon! My hutch was getting a makeover! I used these items for this makeover. Affiliate links are provided for your convenience. You can read about my full disclosure here.
Painting Knotty Pine – My Hutch Makeover
- Cleaner or degreaser – I used soap and water and followed with vinegar, but you may need a degreaser like this one.
- Paint brushes
- I used a stiff brush for dry painting the paint and a chippy brush for the antiquing glaze.
- Paint – I got a sample size of Valspar Night View 4007-4C
- Valspar Antiquing Glaze
- Paper plates
- Paper towels
- rubber gloves – or be like me and scrub your fingers for 20 mins afterward!
Get to scrubbing!
First, you have to clean your surface. If you don’t know where your piece of furniture has been, who knows what it’s been exposed to or if the former owner loved oil based polishes. When in doubt, scrub it out.
Glazing the Pine
I could have started painting first, but I wanted to see if my glazing idea would work. I LOVE Valspar’s antiquing glaze and have used it for years. If they asked me to Vanna White their product for them, I would gladly don my evening gown and show it off! In fact, I should probably own stock in it I use it so much.

For the bare pine, I use a paper towel. I know that’s not a fancy schmancy technique, but I like the workability of the paper towel. It holds the glaze well, you can fold it, and it lasts a long time. I glazed the entire back of the hutch with one paper towel!
But I do recommend wearing a rubber glove or else you’ll be redoing your manicure!

Here’s a comparison shot of the finished back and the unfinished sides. Isn’t it just amazing how that glaze took all that orange tint away? This was getting me really pumped up by this point!

Dry Brush the Paint
Now this is where my ‘technique’ comes into play. As I mentioned in my painted dresser post, I let the piece ‘speak’ to me. I wanted to honor the age of this piece, so I went with a layered dry brush method to slowly build up the paint as if it had been there for years.

I have to tell you, that at dusk and at first glance, I almost left this piece with the first coat, but boy am I glad for changes in light because the next morning, it didn’t look as good as I first thought.


It looks like a toddler that got into her momma’s makeup! Not quite right.
So I applied a second coat.
Here’s where the paper plate comes in handy. I dab my stiff brush into a bit of paint then remove some of the paint onto the paper plate with a few quick swipes. It’s great because you can also pick up the paint you had just wiped off. I’m all about not wasting anything! Now comes the fun part!

Glazing the paint
This is where your piece can really transform. I call it my Bob-Ross-Christmas-tree-light-eye-squint technique. You dab a bit here, step back, squint, and adjust as needed adding your happy little glaze wherever it’s needed. I use a chip brush for this.

I opt for one with not a lot of bristles. It feathers out the glaze so much easier on the paint than my paper towel method does. *TIP:For this piece, I did scrape a bit of the paint away from the edges to mimic worn spots from years of use before I glazed.
I get just a small amount on the tip of my brush.

First I apply in following the grain of the wood and let it sit for about a minute.

Then I use the same brush as a blending tool, mixing swirls and dabs until I get the glaze just the way I like it. I finish it off with an extremely light brush following the line of the wood grain.

I love how the glaze adds depth and character by highlighting the dings by mottling the paint. The piece instantly it appears as if it’s old and weathered.

Finally, I finish the piece with a few extra dabs here and there where hands might touch, leaving marks and years of worn in dirt. Now here’s a little something special that just so happened to occur.
Painting Knotty Pine
The Reveal

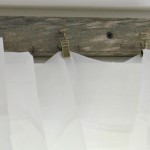
My aunt gave me these old marriage licenses that belonged to my great grandparents around the same time that I got this dish. Last year I framed them and hung them on each side of the hutch. Do you see that old blue robe in the framed picture?
Suddenly, I notice it more, especially since it’s next to the blue hutch. Little things like that are certainly the candle on the already iced cake!
I’ve been on the hunt for a few more blue dishes and I’ve found a few so far for a steal!


Now my milk glass finally pops off the shelves! And it’s finally a perfect match for my grandmother’s platter.


Additionally, I hope this inspires you to allow your furniture to speak to you and to not be afraid of painting knotty pine if it needs it! And as always, I want to celebrate you, so please share your creations with me!
Here are a few of my other furniture redo’s for you to check out!


I always share with these friends.
Pin This for Later!